Getting Started with Android Development
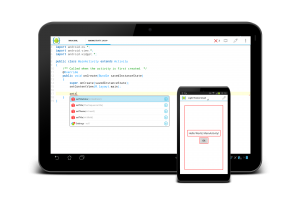
Last fall I purchased a Nexus 7 (2013) and have really enjoyed the pure Android experience. I'll be retiring my S3 and buying a Nexus phone to replace it in the near future. Anyhow, one thing that's always lacking is a way to develop on the tablet...or so I thought! Enter AIDE, an Android IDE that allows you to develop and run applications right from your tablet!
It comes with the code for Tetris, a Clock Widget, and a Hello World app. I started hacking together my first native app. And tried to run it. Of course, it crashed. So, Google, and I download a few logcat readers. None seem to work. I do some more research and learn that as of the Jelly Bean update, apps can no longer read each others logs. This was added for security reasons, as some applications (facebook) were logging passwords in the log file, meaning, a maliscous app could easily read your facebook password from it's logfile. Which now means, you need to connect your tablet to a pc to read the logs, and determine why your application is crashing. At first, this annoyed me. It took a while to get that work, and I'll show you how. But if you plan to deploy your app, you're going to want to have log files sent to you anyway. After showing you how to read logcat from your PC, I'll show you how to write your first app in AIDE, that will email (or change it to write to a file you can open) it's logcat after it crashes. It will allow you to develop, without the need for a PC.
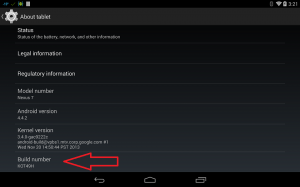
First, you need to enable developer mode on your tablet. It used to just be in the settings, but now it's more complicated. Open your settings and scroll down to "About tablet" (phone, or whatever). Scroll down to the Build number, and click it 7 times.
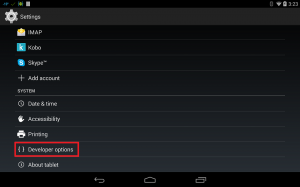
You'll see a message that developer mode is now enabled. Success. Back in the Settings screen you'll now see Developer Options.
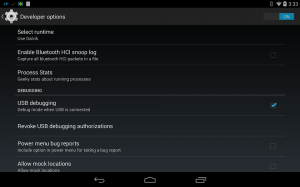
In there, turn on USB Debugging
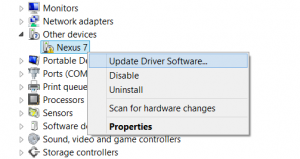
Next we need to install drivers, you can get the latest Google USB Driver from http://developer.android.com/sdk/win-usb.html. Unzip them to a location your machine, I chose c:\Android Tools\UsbDriver_. Now, open Device Manager, and find your device under "Other devices"
Choose "Browse my computer..." and navigate to the folder you extracted the drivers into. Make sure "Include Subfolders" is checked. And install them, you should now see the device installed correctly.
So, now that the drivers are installed, let's get adb installed, you can download r19.0.1 for windows here which is currently the latest version. Just extract the files onto your computer, I stored them at "C:\Android Tools\platform-tools" on mine.
Open a command prompt, go to the directory you just extracted adb.exe into, and try issuing the command "adb devices", you should see a result listing the attached device.
C:\Android Tools\platform-tools>adb devices
 List of devices attached
 06e96062 device
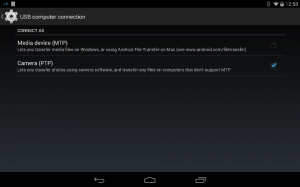
If nothing is attached, you many need to change the Connection type with your computer, on your Android device, go to Settings -> Storage, and click the elipses in the top right, you'll come to this screen, try changing between the two modes, one should work. On mine it was Camera, others have reported differently.
If all is working correctly, you should be able to dump the logcat contents with the command
adb logcat
Or to a file
adb logcat -d > logcat.txt
This logcat grows quickly, if you want to clear the logcat of your device, issue the command
adb logcat -c
And that's all for now. My next article should be a walkthrough of using AIDE to get a simple app up and running, with logging, so you can do do your development without needing adb to view logs, and thus, remove the tether to your computer.
Now, back to coding!
